The Main Principles Of Drywall Repair Columbia
Table of ContentsEverything about Drywall Repair ColumbiaWhat Does Drywall Repair Columbia Do?Drywall Repair Columbia Can Be Fun For EveryoneUnknown Facts About Drywall Repair Columbia
Press some, yet not all, of the compound out from under the tape so you do not produce a huge hump on the wall surface. Promptly apply a light finishing to the topside of the tape, tapering it out onto the wall.A slim coat is easier to sand, and also you'll be much less most likely to remove as well much while fining sand and subject the patch. For joint compound to show up flush with the wall near the damage site, "plume" the mud as you apply it.
— Cloud Links (@ldcloudlinks) January 26, 2023
If you reduced edges on sanding drywall the repair work site will be noticeable, so take your time. As soon as the repaired area is dry, require to it with some fine-grit (100 or 120) sandpaper. After the preliminary of fining sand, include a 2nd layer of mud, spreading it concerning 2 inches past the boundaries of the very first layer.
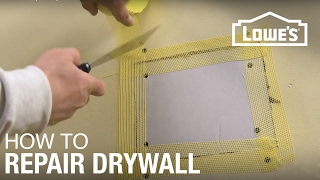
A lot of drywall fixing packages featured every little thing you require for wall surface fixing, consisting of the mesh, spackle, putty knife, and also sandpaper. Begin by putting the spot over the opening, after that spread joint compound over the spot and also smooth around the edges. When dry, sand until smooth. As a residence works out, its framework can turn.
Unknown Facts About Drywall Repair Columbia
Drive a drywall screw halfway into the facility of the strip. Holding the strip by the screw head, place it inside the hole. Placement the furring strip to make sure that the drywall overlaps it on either side. While holding the furring strip in location, drive numerous screws through the drywall right into the furring strip to make sure that it's safeguarded in position.
Image: istockphoto. com, Numerous DIYers reduced corners by stopping working to utilize drywall tape when mudding joints. This is a mistake. Drywall tape assists hold the joint compound in position, preventing it from sagging as it dries out or breaking and also crumbling out of the seam in time. There are numerous designs of drywall tape you can use.
Photo: istockphoto. com, Think read this post here you're done? Not so fast! Run your turn over the repair work to guarantee that it feels smooth. With your temple against the wall, look for humps that may need more sanding. Once you're satisfied with the look and also feel of your patch job, prime and paint the area.
The Only Guide for Drywall Repair Columbia
, although you can purchase bigger patches separately. Make sure the opening you need to repair is little sufficient for these spots to cover before using one of these packages (Drywall Repair Columbia).
Use a 2nd coat of joint substance if needed to completely fill and cover the location. As soon as dry, sand the area smooth. Repair the wall paint. Pointer: If it's been a while given that the wall was last painted, you may require to repaint the entire wall, not simply the patched location, to make sure the shade suits.
Distinctive drywall is a bit more complex, however still pretty simple to repair. Sand your spot location smooth. In a little bowl, mix 4 parts joint compound as well as 1 part water. Dip a stiff brush right into the mix as well as hold it shut to the wall, bristles up. Flick the combination onto the wall surface by running a gloved finger across the surface area of the bristles.

Getting The Drywall Repair Columbia To Work
Shake the can as well as spray the spot area in a round activity 6-18 inches from the wall. Enable the textured substance to dry according to the supplier's directions, after that prime and also paint the surface area.
It might seem counterproductive to cut a larger opening go now in the wall, but it is the only way to obtain a strong, smooth coating in the end. To cut your hole, beginning by utilizing a stud finder to my response find the studs on either side of the damage and also place a level over the opening, straddling the two studs.
Our house featured a layer of 3/8-inch drywall beneath the 1/2-inch drywall, most likely as a means of bringing the surface of the drywall bent on fulfill a plaster surface area or existing drywall. To prevent purchasing and also reducing material to pad the stud as well as compose the difference, we left the 3/8-inch drywall on the studs as a spacer and also put the 1/2-inch drywall over top of it, equally as we discovered it.
If you were to just screw a spot to the studs on each end, your drywall mud would split in no time and also the patch itself would never ever survive even the tiniest hit. Because of this, it is wise to put a scrap item of wood in the center of your cutout and also screw it in location utilizing drywall screws via the existing drywall (Image 1).